Thursday, December 20, 2018
Back again
I'm horrible at posting even on a semi-regular basis, but here I am with an update. I've been very busy lately chasing my toddler, but have been getting back into crochet and crafting. Yes, at 40 years old I had another baby, which has been exciting to say the least. For now I'll just say I'm looking forward to posting pictures of recently completed projects soon. Until then, have a great day!
Thursday, August 29, 2013
Stop Smoking


It ruins your sense of taste and smell
Ashes all over the tables and computer
You could be saving money for a computer (or other item)
It causes bad breath
It hurts your throat and lungs
It makes your voice scratchy
1 pack=$3.50 7 packs a week=$24.50 $98/month $1274/year (adjust to your own cig prices and how many a week you smoke)
It makes a bad impression on others
It harms those around me, especially my children
It stains your teeth, fingernails, walls, mirrors, everywhere
It is a useless habit that has NO benefits
The smell clings to your clothes and skin
It can make you dizzy and give you a headache
It gives you less air to exercise or play with your kids
Having to go outside to smoke in the heat, snow, rain, etc
It makes books and crafts unsellable
Feel free to change these up to reminders that work well for you.
Now, the trick is to force yourself to read EACH card as you make your way down to the pack of cigarettes in the box. Chances are, after reading several of these reminders, you are going to remember why you don't really need that cigarette after all. So far this has been working for me. Just remember, you have GOOD reasons to not smoke, so remind yourself before EVERY cigarette why you don't want to light it up.
Wednesday, August 21, 2013
Business Card Box
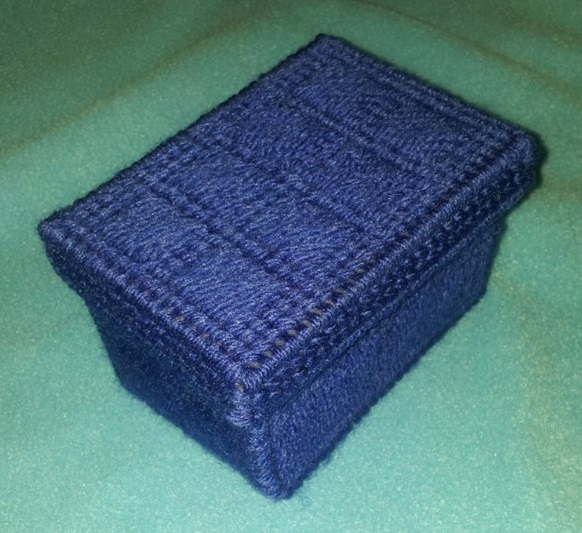


TARDIS Docking Box


Wednesday, August 07, 2013
Homemade Drum Shade Chandelier


Dining Room Make-over Part 2
Yeah, I know... there's no post titled Part 1. But it was the boring stuff of basic cleaning, so I left it out.
Part 2 involved washing the walls and baseboards, as well as the window blind. I used vinegar and water (half and half) in a spray bottle to mist the wall, and a rag to wipe it off. Got most of the finger marks, stray bits of food?, and other stuff, leaving the walls if not perfect, at least good enough for a coat of paint. For the window blind, I soaked it in a tub with water and vinegar, then lightly scrubbed each little slat with a dish brush. Tedious, but easy enough. Then I used a couple broomsticks propped across the top of the shower curtain rod and edge of tub against wall to hang up the blind to drip dry. Looks like a brand new room! (Almost)
So I picked out the colors I want to use. Olive Khaki (green) for the walls, and Leather Brown for the trim, and details. (More on those details later)
For now, here's a look at my inspiration:


Thursday, August 01, 2013
Closet Makeover
So I decided to make over my closet in the dining room. It was a catch-all for everything in the house. Vacuum, kids coloring books and toys, lightbulbs, trashbags, etc, etc. It was a hot mess.
 I started by completely emptying the closet.
Then I added shelves down one side, moved the upper shelf back, and hammered nails to hang my broom, mop, etc.
I started by completely emptying the closet.
Then I added shelves down one side, moved the upper shelf back, and hammered nails to hang my broom, mop, etc.

 Much better. :)


Saturday, July 27, 2013
My homemade Lightbox


Sunday, July 21, 2013
It's been awhile since I last checked in. Lots of things have been going on.
I am now officially a Domestic Engineer. I am able to work from home, spend time with my children, and still manage the household budget.
Two of my sisters have joined me in this job field, and we are looking to make it a success.
July is DeCluttering Month!
We are going through every room in our house and decluttering all the unnecessary junk from our homes. This will make it a little easier to keep our rooms clean, and streamline how our homes look. Without all that junk cluttering up everything, it should look a lot nicer.
However, this is leaving me with a lot of things I need to get rid of. Some items will just be tossed, others I feel I could sell and get a bit of money from.
I do plan to have a big Yard Sale the second weekend of October, and maybe before then if all goes well. Second weekend of October coincides with the Civil War Reenactment at the State Park a mile away, so there is usually a lot of traffic, and therefore no need to advertise! That's usually a very good weekend to have a yard sale. But that's many weeks away and hopefully the decluttering will be done by the end of this month, so a yard sale or two before then might be good.
August is "Make Your House a Home"
I have a lot of projects planned, including redecorating several rooms of my house.
A sneak preview...
Laundry Room/Office - Doctor Who themed
Dining Room - repainted, family tree mural, new light fixture, new window treatment
Bedroom - repainted
Pantry - turned into a craft room, painted, decorated, organized
Hallway - big open area turned into a play area for kids, painted, organized, decorated
Kitchen - cabinets stripped, repainted, walls painted, maybe countertops painted...
Wow, just realized how ambitious I'm being. LOL. Wish me luck!
Subscribe to:
Posts (Atom)


